Up ] Engine How To's ] Reliability Mods ] RX-7 Notes ] RX-7 Glossary ] Modification Pros & Cons ] My RX-7 ] Brake - Big Brake Install ] Brake Line Replacement ] Brake Proportioning Valve Install ] [ Brake 929 Master Cylinder Install ] Brake Line Flaring ] Brake Bleeding ] Brake Master Cylinder Bleeding ] Shocks & Springs Install ] Antiroll Bar Bushing Upgrade ] Gauge Install ] Short Shifter ] Antenna Replacement ] Turbo Timer Install ] Racing Harness Install ] Racing Seat Install ] Hand Grip Repair ] Raise Rear View Mirror ] Fog Light Install ] Daytime Running Lights ] Safety Wire ] Polish Aluminum ] Repair Door Lock ] Trailer and Hitch ] Buy a Used RX-7 ] Other How To's ] More Hints and How Tos ]

929 Master Cylinder Install (for big brakes)

By Rob Robinette

Why would you need to upgrade the master cylinder?

When you upgrade to larger brake calipers your brake pedal movement may increase because more brake fluid has to be moved to power the bigger (or more) pistons. Upgrading to the Mazda 929's master cylinder (MC) can bring the pedal movement and feel back to stock (or better than stock). The stock master cylinder is 15/16" in diameter, the 929's is 1" in diameter and about 1/4" longer. That 1/16 of an inch larger piston pushes quite a bit more fluid. After I did this mod my brake pedal was firmer and it required less pedal effort to lock the brakes. I'm very happy with this upgrade.
The only difficult part of this mod is the fabrication of two 12 inch lengths of brake line which can be done pretty easily if you have a pipe cutter and pipe double-flare tool. You can always take the 929 master cylinder to a brake shop and have them fabricate and install the brake lines. You can do everything else and save some cash.
master_cylinder_compare.gif (193005 bytes)

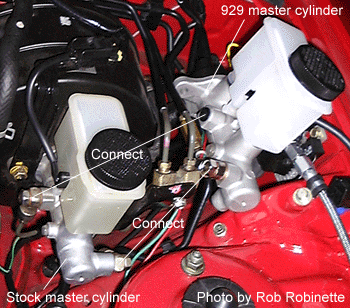
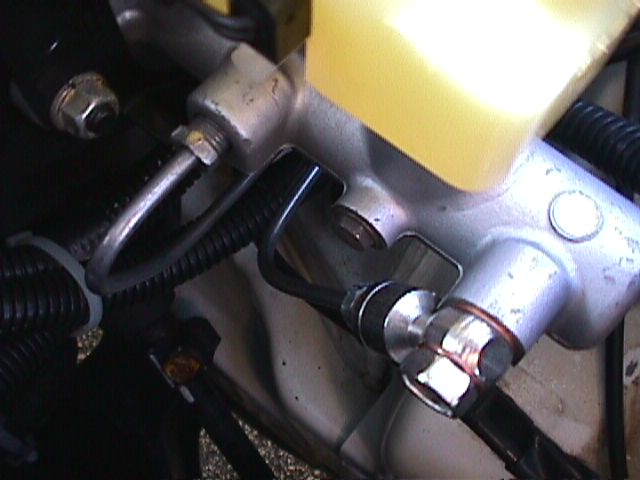
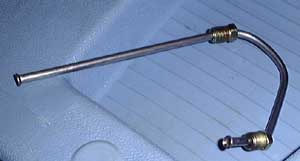
Master cylinder comparison. The rear brake line connector on the 929 MC is designed for a flare fitting, not a banjo bolt like the RX-7 MC.

What You Need

A 93 Mazda 929 master cylinder  part # HG31-43-400G (ABS version) - I got mine from Jeff Haas Mazda for $170 (that's a 25% discount for ordering from their 800 number: 800 233-2991). Pep boys wanted $214 for it. Mazda Competition Parts will sell it for $135 if you are a qualified racer.
You also need a 929 MC metric flare nut, the MC comes with the banjo bolt, but you need a flare nut for the rear MC brake line connector.
Also pick up two 12 inch lengths of 3/16 inch brake line ($4 auto parts store), a pipe cutter ($7 Home Depot), pipe double flare tool ($40 Pep Boys, do not use a single flare tool-it's not safe), 10mm flare nut wrench ($4 auto parts store--if you try to use a standard 10mm wrench you will round off the fittings)
 
master_cylinder11.gif (14598 bytes)

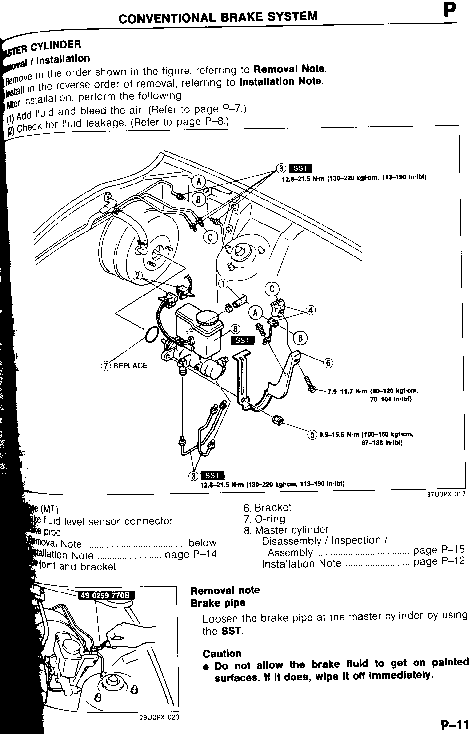
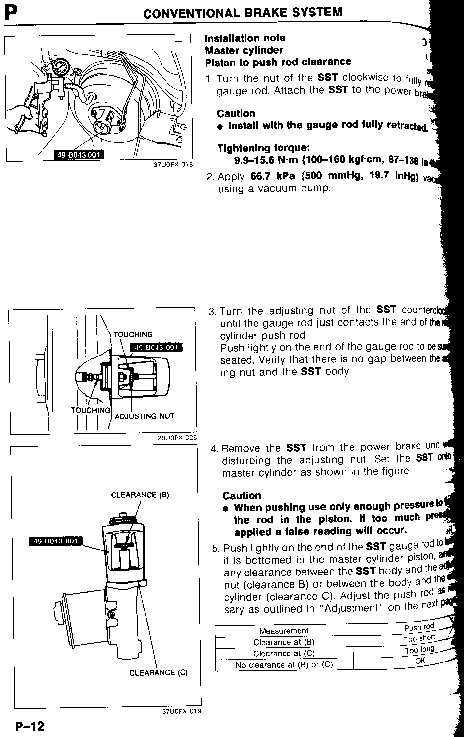
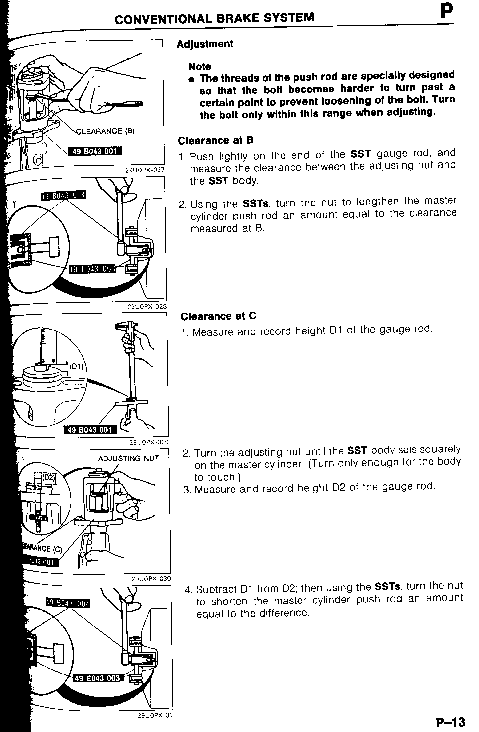
Workshop Manual - Master Cylinder Removal/Installation

Removing the Master Cylinder

Warning
Do not attempt this modification yourself unless you are a very competent mechanic. Two short brake lines will have to be fabricated and a single point failure in the brake system will result in the total loss of brakes and possible damage/injury/death! A brake shop can fabricate the brake line and hook it up to the new master cylinder.
Before you remove any of the brake fittings, carefully clean all around them, so that dirt can't get into the system as the fittings are opened.
master_cylinder1.jpg (19449 bytes)

Remove the stock MC

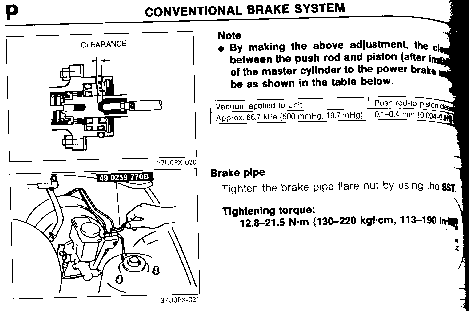
Start by putting some rags below the master cylinder (hydraulic fluid will bubble and peel your paint very quickly). I recommend getting a pack of various size vacuum plugs for this purpose. I put plugs on each of the two brake lines and one on the hydraulic clutch connection to prevent excess fluid drippage. Use a 10mm flare nut wrench which is the SST (Special Service Tool) the RX-7 Workshop Manual calls for to loosen the brake lines that go into the double brass fitting next to the filler cap (item C in the first diagram above). I highly recommend you buy a $4 10mm flare nut wrench (the SST mentioned above). It has a wider jaw to keep you from rounding off the nuts and its length will help you torque the brake fittings properly (it's hard to do with a 5 inch long 10mm wrench). By disconnecting the brake at the brass double fitting, very little fluid will drip out. I put vacuum hose caps on the brake lines once I got them loose. Remove the two nuts that hold the MC to the brake vacuum chamber. Remove the large vacuum line running to the vacuum chamber to relieve the vacuum pressure and remove the MC. If you don't release the vacuum you will have trouble getting the MC out.
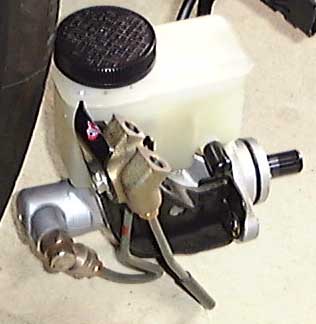
You'll have to swap the master cylinders' reservoirs because the 929's doesn't have an hydraulic clutch connection. Remove the Phillips head screw below the reservoir and pop off both reservoirs and then swap them. Use a little hydraulic fluid on the rubber seals to make the installation of the reservoir easier. Reinstall the Phillips head screw to secure the reservoir.
The 929 MC has a fitting for one of the two brake lines on the wrong side (engine side, rather than towards the fender). The rear brake line needs a metric flare nut, the other already has a banjo bolt with a flare fitting installed.
master_cylinder3.jpg (8248 bytes)

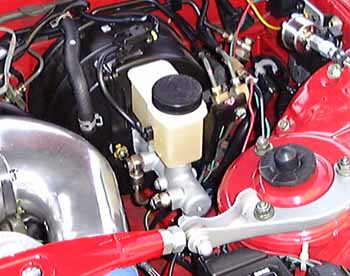
The new front brake line

Both brake lines on the MC will have to be replaced. I bought two prefabricated, 12 inch long 3/16 inch brake pipes, cut off one end, removed the flare fittings, put on  metric flare fittings, bent them over a 2 x 4 railing to get a nice 180 degree bend, cut it to fit with a pipe cutter, put the other metric flare fitting on and double-flared the new pipe. See Photo. See the Flare a Brake Line How To for instructions on how to double flare a brake line. The rear line runs straight out from the rear flare fitting a couple inches and bends down and under the MC, coming up to the brass junction block. Make sure the lines don't rub the MC or its support. Connect the new brake lines and torque the connectors to 113 to 190 inch pounds (10 to 15 foot pounds).

The front (right) and rear 929 master cylinder brake line fittings. Photo by Paul Winter

Mount the master cylinder in your car by securing the two nuts and connecting the hydraulic clutch line but don't hook up the brake lines yet. Screw the correct size bleeding kit fittings into the two line connectors at the double brass pipe fitting and run the hose from the fittings up into the master cylinder reservoir (the fluid loops around from the master cylinder's outputs back into its reservoir). See photo above. Fill the MC reservoir with brake fluid and pump the brake pedal until you don't see any more bubbles coming out of the hoses. It took me about 5 minutes of pumping. Remove the bleeding hoses one at a time and hook your brake line up quickly so you'll limit the amount of fluid that runs out. Torque the brake lines to 113 to 190 inch pounds (10 to 15 foot pounds).
master_cylinder_installed.jpg (27071 bytes)

929 MC installed

Follow this procedure to bleed the master cylinder (very important) to remove air from the master cylinder before pushing that air through your ABS and brake system.
Bleed the brake system and do a pressure check. I had very little air in the brake system, the MC bleeding worked. See the Brake Bleed How To. My brake pedal is firmer now and there is less pedal travel than with the stock MC. Be careful during your test drive, your brake vacuum will take about 30 seconds to replenish itself. Good luck.

Adjusting the MC Piston to Push Rod Clearance

I didn't do this because the piston extension of the 929 MC was exactly the same as the extension of my stock MC and of course I didn't have the three Special Service Tools (SST) to do it by the book. My brakes work great without the adjustment. The RX-7 Workshop Manual describes the procedure on page P-12. It shows three SST's being used. I scanned in the images from the manual as best I could.
master_cylinder12.gif (15326 bytes)
master_cylinder13.gif (14321 bytes)
master_cylinder14.gif (6632 bytes)

Adjusting the MC Piston to Push Rod Clearance

Rob Robinette

More On the Master Cylinder Upgrade

A little history... A few months back, a prototype Cooltech brake system was installed in Project RX-7. Our goal was to play around with different systems and see which set up worked the best. Our first system consisted of 14x1.1" Metal Matrix Composite (MMC) rotors with Porsche/Brembo calipers (from rear of 993 turbo). FYI, MMC rotors are approx. 70% lighter than traditional iron rotors. They also dissipate heat up to 5 time as fast, according to Cooltech. Although much larger, and probably far stiffer, than the stock 4 piston calipers, the Brembo caliper had smaller pistons. This greatly reduced pedal travel (which was good), but reduced the clamping force of the system (which was bad) at a given pedal pressure. In fact, with this set up, the stock rear brakes would do more work than they should. Once ABS kicked in, it behaved as an electronic proportioning valve, which somewhat masked the problem. Until that point, the car was very loose under braking (needed more front brake).
Then we jumped on the other side of the fence: larger-than-stock pistons from the "big red" caliper (even more enormous caliper-from the front of a 993 turbo). We also increased the thickness of the MMC rotor from 1.1" to 1.25". Just barely fit behind the airy spokes of the big 17" TE37s. Around town, this set up was very nice. In fact, pedal travel was very close to stock. Braking force, on the other hand, was exceptional. However, on the track, while braking from high speed, weaknesses became apparent. It almost felt as if there was air in the system-it took two quick pumps to get the characteristically firm pedal it had when driven on the street. Repeated brake bleeding did not help.
Today, thanks to Mostly Mazda, a larger master cylinder from a '93 929 was installed. Stock bore is 15/16", 929 bore is 1". Doesn't sound like much of a difference, but it's significant. RESULTS: Firm, firm, firm pedal under any condition I can manage on the street. Ever drive a 911 turbo? Same feel. About one inch of free play, but then it stops. You modulate more with pressure and less with travel. The pedal lines up right next to the gas pedal (and the David B.'s pedal adapters, of course)-- making heel/toe footwork very easy. Braking is very, very strong. Braking also feels more "direct" and far less vague. You can even feel the holes in the rotor scrape against the pads. Very very fun. With RA-1 race rubber on, braking from high speed is absolutely incredible. Decelerates so hard that it repeatedly skips my stock CD player. It never skips otherwise. Looking forward to trying it out on the track with a prototype set of trick brake ducts that should be in next week. Should have a better idea of overall f/r balance. So far, I can find no fault. I'll update the list...
Thanks to Jim O'Brian for the 929 MC upgrade info!
Shiv

 Home ] Up ] Engine How To's ] Reliability Mods ] RX-7 Notes ] RX-7 Glossary ] Modification Pros & Cons ] My RX-7 ] Brake - Big Brake Install ] Brake Line Replacement ] Brake Proportioning Valve Install ] [ Brake 929 Master Cylinder Install ] Brake Line Flaring ] Brake Bleeding ] Brake Master Cylinder Bleeding ] Shocks & Springs Install ] Antiroll Bar Bushing Upgrade ] Gauge Install ] Short Shifter ] Antenna Replacement ] Turbo Timer Install ] Racing Harness Install ] Racing Seat Install ] Hand Grip Repair ] Raise Rear View Mirror ] Fog Light Install ] Daytime Running Lights ] Safety Wire ] Polish Aluminum ] Repair Door Lock ] Trailer and Hitch ] Buy a Used RX-7 ] Other How To's ] More Hints and How Tos ]